

Harvest means bringing the bounty of the garden inside. The end of the growing season entices us to save a handful of this year’s yield to be planted in the future; banking this type of insurance against loss and famine transcends the season. Humans have been saving seeds for thousands of years, and many attribute the rise of civilization to this instinct to set aside the best of this year’s harvest to be sown the next spring, or traded to be carried to other lands.
If you’ve never saved your own seeds (which, given the wide availability of cheap vegetable and flower seeds, is understandable), this is a great season to consider a try. Not only are you closing the loop without the footprint of additional packaging and shipping, but you’re activating an ancient tradition — the next best thing to saving time itself!
Seed Needs
Besides the obvious outcome of having them ready to put in the ground for next year, saving seeds is cheap and often straightforward: harvest the “fruit,” extract the seeds, then keep them dry and cool until it’s time to plant. Another rule of thumb is to choose the plant you’re saving thoughtfully: good specimens will be large and free of disease. Other complicating factors may include the right time to harvest and what methods of extraction apply, but much of what you plant in your garden once can be saved and replanted for seasons to come, or traded with fellow gardeners.
I’ve chosen a few vegetable and flower seeds to discuss, from tomatoes, beans, and lettuce to marigold, calendula, and butterfly weed. Here’s why these types of seeds are easy to keep: it’s possible to get a seed that produces plants very different from their parents, but because these species are all open-pollinated or self-pollinated, they’ll produce the same plant reliably.
Open- and self-pollinated plants retain the same genetic traits as their parent plants, while cross-pollinated plants are “born” from the union of genetically unalike pollination within the same species. (Even seasoned gardeners don’t need to worry much about this unless they’re producing large quantities of seed for sale, but it explains why cross-pollinated plants like squash might need to be kept apart to prevent unpredictable hybrids, or why you need to plant two different types of compatible apple varieties to produce fruit.)
Another important guiding principle of seed saving is to keep them stored in a cool, dry place. This inhibits them from growing before the season — and prevents the deleterious effects of mold. If you’re unsure about how dry seeds are before storing, I’ve found that including a whole, unopened package of silicate desiccant (like the ones found in a box of new shoes) goes a long way.
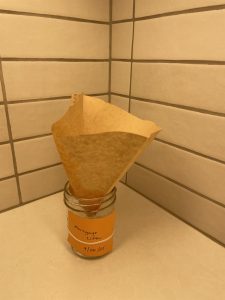
On the subject of repurposing materials to save seed, consider this permission to DIY your own envelopes from recycled paper, dust off baby food jar collections, and hoard orange pharmaceutical containers — all are excellent ways to keep your stash dry and cool. Be sure they spend the majority of their time in relative climate control, especially with low humidity, to ensure your seeds last for the next few years, about as long as you’d want to keep the seed before its germination rates plummet. On that note, do not neglect to label your seeds with the plant variety and date of harvest. And finally, don’t forget to safeguard seeds from rodents and other pests inside the storage space.
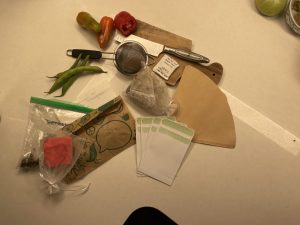
Needed Materials
- Ripe or past peak fruit/vegetable/flower (depending on species)
- Kitchen sink/access to running water
- Dry, cool space in home away from pests
- Strainer
- Paper envelopes (those specially sized for seeds can be purchased, but any dry paper folded into an envelope shape will do!) and/or small, clean jars with lids
- Paper towels and/or coffee filters
- Pencils and permanent marker to label
- Optional: organza/jewelry bags, silicate packets (such as those found in electronics and goods to resist humidity)
Deep Seeded Ethics
Once you’ve started saving seeds, it can be tempting to view the world in autumn as a giant, free seed store. Before raiding the shelves, take a moment to consider how and when to take seeds — and from whom you’re taking them.
While I only grudgingly allow wildlife partake of my vegetable garden, I know that the seeds and nuts of native species in the rest of the yard are the perfect food for the animals that coevolved with them and plan accordingly to leave as much as possible for the animals that need them. And the guidelines of human propriety apply here too: Ask for permission before taking anything, seed included, from private property.
Even something as inconsequential as picking flowers on a hike can deprive the ecosystem of that plant’s benefit. I can “take” it by snapping a pic, running it through a plant id app like Google Lens or iNaturalist, or turning to other plant folks in my life, to research it. If it’s something I want in my own space, I’ll see where I can get it — preferably a local nursery — but I also check with my friends and fellow gardeners, as well as my local library. Yes, Peekskill’s own Field Library has a seed bank!
This fall, I invite you to save next year’s bounty by saving some seed now.
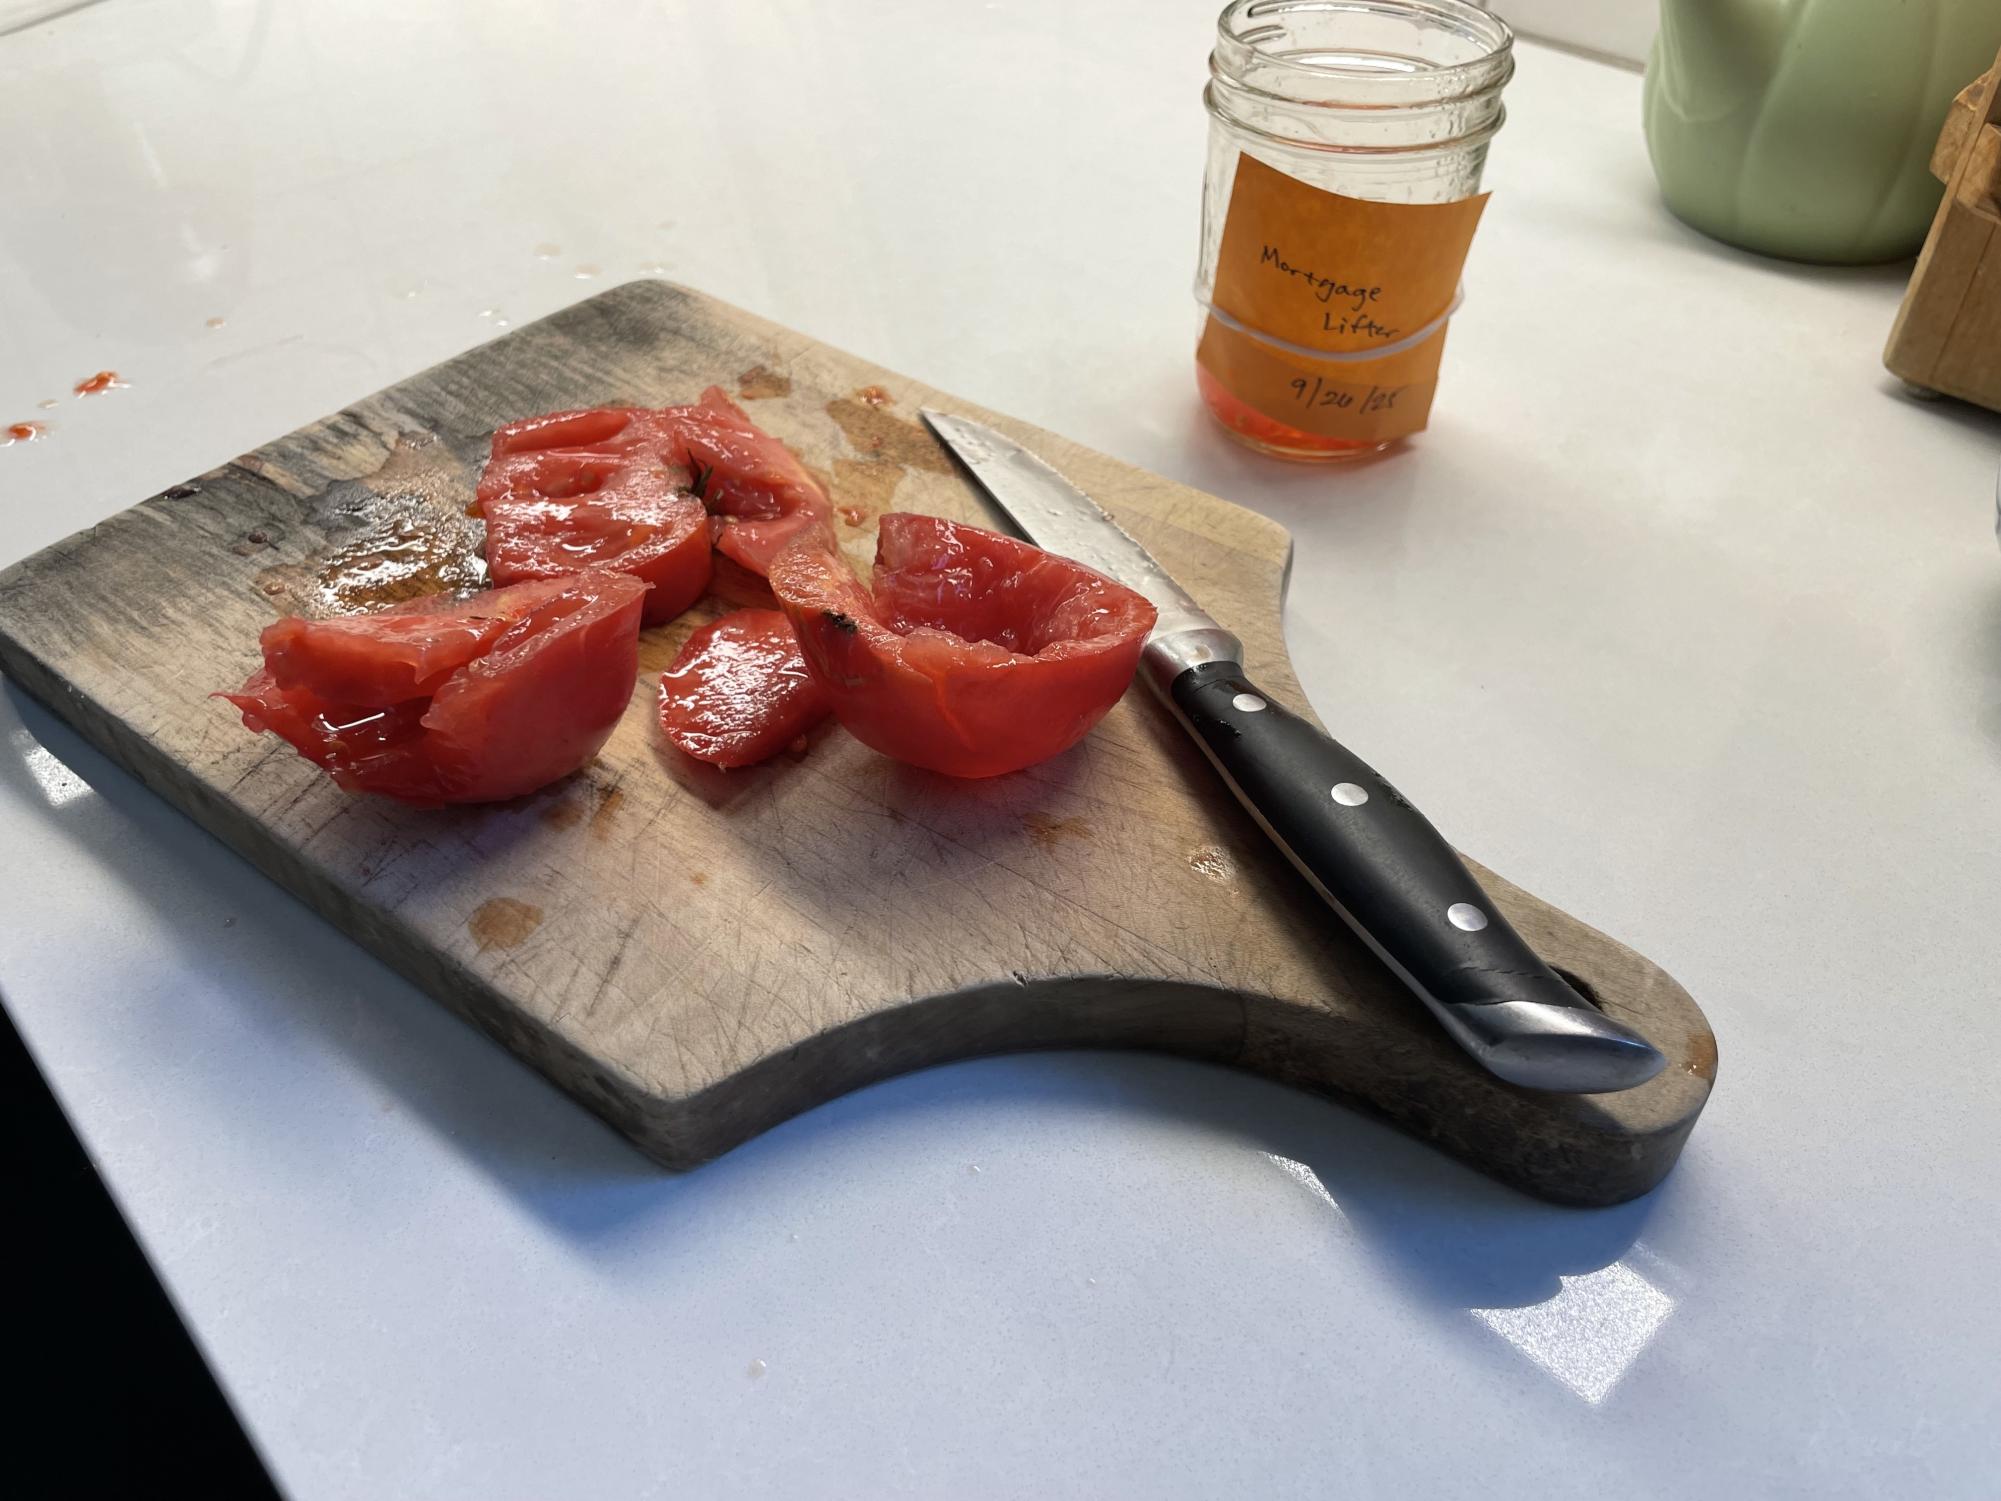
Tomatoes
Harvest when fruit is ripe to overripe (this is also a great way to use up any stragglers left on the vine before or even after frost). Cut open, then scoop wet seeds included into a small container. Add enough water to allow contents to float easily. Allow the mixture to ferment for five to seven days, swirling when you remember. (Fermenting the pulp will break down the germination-inhibiting gel surrounding the seeds, as well as reduce disease and contribute to higher germination rates.) Then, pour out the liquid into a strainer, rinse the seeds, and set them out to dry completely (coffee filters or paper towels work well) for two to three days. Save totally dry seeds in a paper envelope or small jar.
-
Cut open, then scoop seeds into a small container like a glass jar.
-
Let your tomato mixture sit on a countertop and swirl daily. Allow fermentation to occur until a fine mold appears on the top.

-
Pour liquid into a mesh strainer to rinse, rubbing away goo from seeds, then into a secondary filter — disposable coffee filters are great. Spread contents to dry, picking away any leftover pulp.


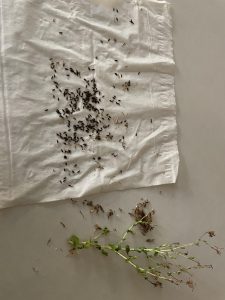
Lettuce
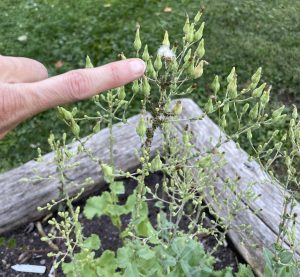
In saving seed, lettuce encouraged us to “let them” long before the slogan entered the zeitgeist. Why? It’s possibly the easiest common garden vegetable to reseed, as the volunteers in my garden will attest. To collect seed, simply let at least one of your lettuce plants bolt — that is, grow a stalk that will eventually flower. (You’ll know long before it sets seed because its leaves will taste bitter.) After it flowers, you’ll know when the seed is ready to collect because it’s fluffed out, like a little dandelion head. Pull this fluff off to reveal the long, thin seeds at the base of the flower. For maximal lassitude, throw half of the flower into a paper envelope for next year and the other half in a garden bed for an early start in the spring.
Beans
This is an especially good use for the end-of-season behemoth beans that no one wants to eat. Simply pick them, put them in a cool, dry spot, ideally elevated on a baking rack to ensure there are no damp spots, and check periodically until beans rattle in their shells. Save seeds sans shell in a paper envelope or sealed, dry jar.
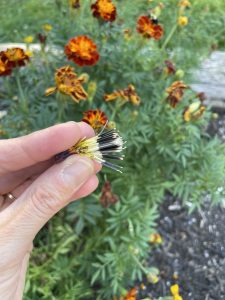
Marigold (Tagetes spp.)
Marigold is a pungent plant that notably repels pests and always benefits from dead-heading, or removing the browned, drier flowers. Simply save what you deadhead in a dry, cool spot and put the seed heads in an envelope or sealed, dry jar. As with lettuce, it can be a great re-seeder if protected from predation over the winter.
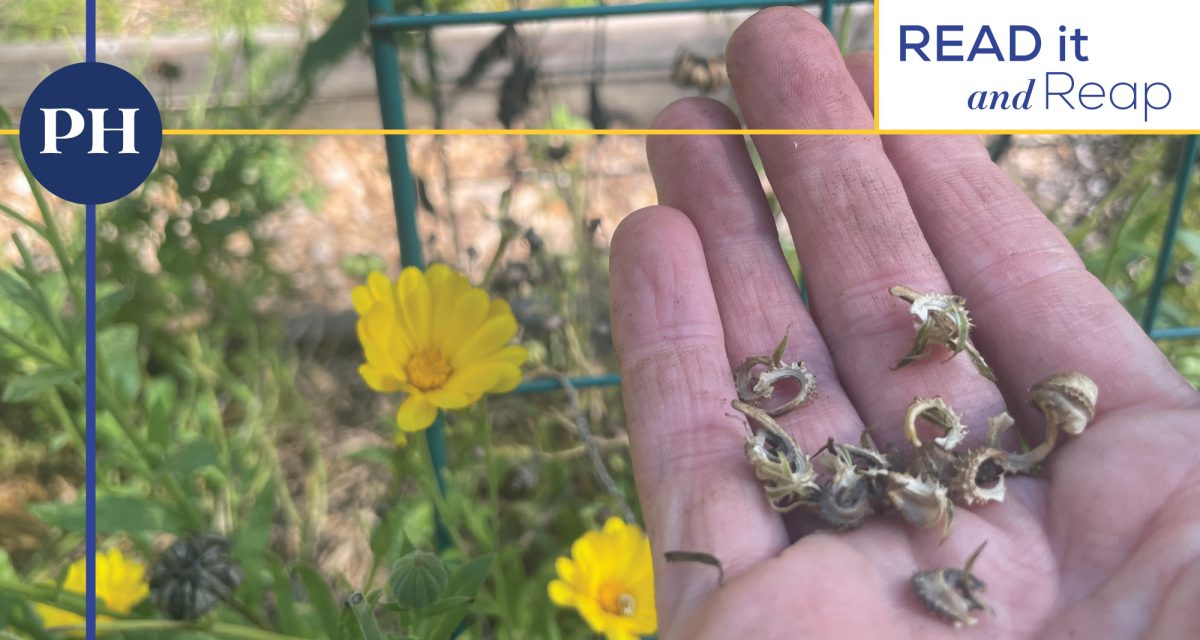
Calendula
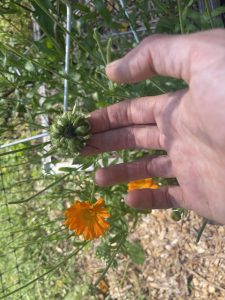
Marigold’s therapeutic cousin, calendula, is touted by herbalists for its skin-healing properties. I love its reliable blooms that persist well into the fall and come in a range of colors, including vibrant oranges, yellows, and pinks. Its seeds are standouts in their perfect worminess — in fact, you’ll know they’re ready to harvest once the flowerhead is “replaced” with these green, bumpy, caterpillar-shaped achenes. Just like marigold seeds, these can be harvested and kept in an envelope or jar, but be sure these fleshier seeds have plenty of time to dry before storing.
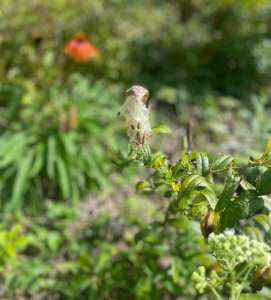
Butterfly Weed (Asclepias tuberosa)
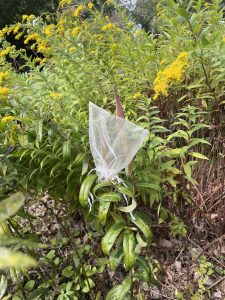
The magical and essential relationship between monarch butterflies and Asclepias varieties continues when we save seed to cultivate for the next generation of hungry caterpillars. Once “ripe,” its long seedpods split, revealing flat seeds each individually tethered to a puff of silk known as a “coma.” Knowing exactly when to harvest milkweed seeds can be tricky. Harvest too early and the seeds won’t be viable, but wait too long and they might blow away in one windy afternoon. Placing a small bag with a drawstring, like a cloth jewelry bag or sheer organza pouch, on a seed pod will ensure seeds stay put until you’re ready to take them, but be sure to remove after a rain to prevent them from rotting.
Interested in saving other types of seeds? Want to get seed-swapping in the future? Have questions about fall clean-up? Email Lucy at [email protected].


![Peekskill girls volleyball in action against Fox Lane on Oct. 16. (Peekskill City School District]](https://peekskillherald.com/wp-content/uploads/2025/10/Lead-photo-6-1200x640.jpg)